domingo, 6 de setembro de 2026

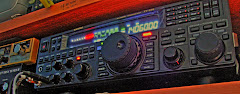
YAESU FT-891 KEYER MEMORY SETTING

 YAESU FT-891 KEYER MEMORY SETTING

1º ATIVAR A FUNÇÃO REC:

  • Mantenha premida a tecla [F] para entrar no Menu Principal.
  • Rode o botão MULTI até encontrar o menu 05-11 [REC SETTING].
  • Clique no botão MULTI, mude a opção para ENABLE e clique no botão novamente para confirmar.
  • 2º ESCOLHER ENTRE TEXTO E MENSAGEM VOZ:

  • Vá até aos menus entre 04-07 e 04-11 (que correspondem a CW MEMORY CH1 até CH5).
  • Selecione o canal que quer configurar e altere para:
    • TEXT: Se quiser escrever letra por letra usando o botão do rádio.
    • MESSAGE: Se quiser gravar o áudio/ritmo diretamente batendo no seu manipulo Morse. 
    3º GRAVAR A MENSAGEM:

  • COLOCAR O RADIO EM MODO CW
  • NA TECLA F, IR ATÉ AO MENU: REC SETTINGS.
  • ATIVAR O "MEM" QUE APARECE NO ECÃN A PALAVRA "REC"
  • RODAR ATÉ AO CH1-CH5 PARA ESCOLHER O CANAL A GRAVAR.


  • NÃO ESQUECER DE VOLTAR AO MENU PRINCIPAL 05-11 [REC SETTING], E COLOCAR DISABLE.

    quinta-feira, 2 de abril de 2026

    Repetidor meshcore - UPDATE via OTA

     Para todos os que têm repetidores na rede Meshcore, este passo a passo pode ser util.

    Nota: Não sou em nada expert nesta matéria, simplesmente descrevo com base naquilo que me foi ensinado por quem entende e que correu bem da minha parte.


    HELTEC  T114

    Antes de tudo deves confirmar que já colocaste o Bootloader no T114


    -> Fazer o download do firmware (NUNCA USAR O MERGE PARA UPDATE)

    -> Fazer login no repetidor via cliente.

    -> Na linha de comandos escrever START OTA

    -> Abrir a APP DFU

    -> Seleccionar Ficheiro -> Device -> Upgrade.

    -> Quando der DONE ou Completo, está feito.


    LILYGO - TTGO (ESP32)

    Não necessita BootLoader.

    -> Antes de tudo fazer o download do firmware (NUNCA USAR O MERGE PARA UPDATE)

    -> Fazer login no repetidor via cliente.

    -> Na linha de comandos escrever START OTA

    -> Vai dar o endereço: 192.168.4.1/update

    -> No wifi do phone, selecionar a rede de UPDATE & ligar

    -> No browser, escrever: 192.168.4.1/update

    -> Selecionar o ficheiro

    -> Quando aparecer completo está feito.

    Este DIY irá ser atualizado.

    02-ABR-2026

    sábado, 15 de abril de 2023

    3D PRINT - GCODE para a Creality Ender3Pro

     3D PRINT - GCODE para a Creality Ender3Pro

    Como diz o titulo, aqui fica o G-code que estou a utilizar na Creality Ender3Pro.

    Nota: Como tenho o AutoLev tem o G29, a seguir ao G28 no Start Gcode.

    (Utilizo no Cura e no Pursa Slicer)

    START GCODE:

    ; Ender 3 Custom Start G-code

    G92 E0 ; Reset Extruder

    G28 ; Home all axes

    G29

    G1 Z2.0 F3000 ; Move Z Axis up little to prevent scratching of Heat Bed

    G1 X0.1 Y20 Z0.3 F5000.0 ; Move to start position

    G1 X0.1 Y200.0 Z0.3 F1500.0 E15 ; Draw the first line

    G1 X0.4 Y200.0 Z0.3 F5000.0 ; Move to side a little

    G1 X0.4 Y20 Z0.3 F1500.0 E30 ; Draw the second line

    G92 E0 ; Reset Extruder

    G1 Z2.0 F3000 ; Move Z Axis up little to prevent scratching of Heat Bed

    G1 X5 Y20 Z0.3 F5000.0 ; Move over to prevent blob squish


    END GCODE:


    G91 ;Relative positioning

    G1 E-2 F2700 ;Retract a bit

    G1 E-2 Z0.2 F2400 ;Retract and raise Z

    G1 X5 Y5 F3000 ;Wipe out

    G1 Z10 ;Raise Z more

    G90 ;Absolute positioning


    G1 X0 Y{machine_depth} ;Present print

    M106 S0 ;Turn-off fan

    M104 S0 ;Turn-off hotend

    M140 S0 ;Turn-off bed


    M84 X Y E ;Disable all steppers but Z


    Basicamente:
    A impressora primeiro aquece, depois faz o auto nivelamento, depois faz a linha lateral.
    Imprime. No Final, sobe um pouco o Z, a mesa vem para a frente. E desliga os "aquecimentos" & steppers. 


    Espero que dê para ajudar alguem.


    Nota:
    Segue abaixo os G-Codes Originais do Pursa Slicer.


    START GCODE:

    G90 ; use absolute coordinates

    M83 ; extruder relative mode

    M140 S{first_layer_bed_temperature[0]} ; set final bed temp

    M104 S150 ; set temporary nozzle temp to prevent oozing during homing

    G4 S10 ; allow partial nozzle warmup

    G28 ; home all axis

    g29

    G1 Z50 F240

    G1 X2 Y10 F3000

    M104 S{first_layer_temperature[0]} ; set final nozzle temp

    M190 S{first_layer_bed_temperature[0]} ; wait for bed temp to stabilize

    M109 S{first_layer_temperature[0]} ; wait for nozzle temp to stabilize

    G1 Z0.28 F240

    G92 E0

    G1 Y140 E10 F1500 ; prime the nozzle

    G1 X2.3 F5000

    G92 E0

    G1 Y10 E10 F1200 ; prime the nozzle

    G92 E0


    END GCODE:

    {if max_layer_z < max_print_height}G1 Z{z_offset+min(max_layer_z+2, max_print_height)} F600 ; Move print head up{endif}

    G1 X5 Y{print_bed_max[1]*0.8} F{travel_speed*60} ; present print

    {if max_layer_z < max_print_height-10}G1 Z{z_offset+min(max_layer_z+70, max_print_height-10)} F600 ; Move print head further up{endif}

    {if max_layer_z < max_print_height*0.6}G1 Z{max_print_height*0.6} F600 ; Move print head further up{endif}

    M140 S0 ; turn off heatbed

    M104 S0 ; turn off temperature

    M107 ; turn off fan

    M84 X Y E ; disable motors


    sábado, 25 de março de 2023

    DXLOG - ICOM IC-7610 INTERFACE CONFIGURATION

     Que este pequeno artigo sirva, para quem como eu, necessita de configurar o programa DXLOG (para concursos /Contest), para funcionar com o keyer interno do Icom IC-7610 sem necessidade de keyer externo.


    Para tal, basta ter configurado o interface desta maneira:

    Acessar via: OPTIONS -> CONFIGURE INTERFACES

    1º Selecionar a porta correspondente (No meu caso COM4), e Radio 1


    Selecionar SETUP


    Importante, No KEYING & CONTROL, tem que selecionar o RTS (PIN7) como CW. Se fizerem esta seleção no DTR (PIN4) não funciona.


    Espero ter ajudado.


    Propostas de melhoria sempre aceites.

    73's de CT1GFQ

    segunda-feira, 14 de março de 2022

    Visita a Portugal de EA3EZG

    Quando se assinala 1 ano da morte do nosso colega e amigo João Costa, CT1FBF, aqui fica um dos muitos apontamentos que tenho com ele, aquando da visita do Jordi, EA3EZG


    sábado, 26 de fevereiro de 2022

     Após 25 anos como radioamador, eis que sou presenteado com os primeiros diplomas DXCC da ARRL


    terça-feira, 6 de julho de 2021

    Xiegu G90 and the COMM Lost problem

     No primeiro dia de teste do meu recente Xiegu G90, tive uma agradavel surpresa:

    Após ligar a chave e morse no local errado, o radio comecou a apitar sem parar, e apareceu uma mensagem no quadrante a dizer COMM LOST


    Após varias tentativas de re-inicar o equipamento, retirar o painel....... a solução seria, recarregar firmware.
    Mas para não me precipitar, contactei o apoio a cliente de radioditty (support@radioddity.com), que 30m depois tinha uma possivel solução, com uma explicação:


    The described situation does happen whenever the communication between the Base-unit (that the part that connects to the power and the antenna) and the Display-unit (that´s the front part with all the operation controls) can not be established. Such thing often does happen, if the blue USB-cable had been connected between G90 and PC before the G90 had been turned on. However nothing to worry about. Together we´ll get you going!

    It is now required to update the Base-unit and the Display-Unit. Whilst having to do that anyhow, I´d advise to update it with version 1.75 as version 1.77 (which quite likely is on your G90) unfortunately turned out to have some bugs. A new version is expected within the next weeks (due to Covid-19 that had been delayed).

    OK, back to your G90:
    All the firmware, software, and user manuals can be found in the Support area on our official website by the following steps:
    www.radioddity.com->Support->choose the brand of your radio->click on your radio model name
    As for the G90 you will get the following:


    Within the archive you will find everything needed (files, documentation, program, ...) to perform the update. Please follow exactly the instructions as given. I personally often forget to checkmark the '1K Option' when doing the XModem filetransfer which causes the update to fail.

    After doing the update for both parts (Base-unit as well as Display-Unit), turn off the G90, fully disconnect it from the power supply, wait a few seconds before you reconnect it to the power supply.
    Press the FUNC-key and keep it depressed. Then, additionally momentarily press the power button to power on the radio. You will be asked if you want to perform a 'Main Reset'. Release the FUNC button. Confirm the question regarding 'Main Reset' by pressing the PRE/ATT button (YES).

    Now your G90 should be fine and waiting for you to enjoy.

    Whenever you turn off your G90, remove any TRS plug (from the blue USB-cable) that might have been inserted in one of the communication


    -ports (Base-Unit 3.5mm TRS 'COMM' socket, Display-unit: bottom left side 3.5mm TRS socket).

    No meu caso, foi so necessário efetuar Upload de firmware da main-unit.

    espero que este meu relato possa ajudar possiveis utilizadores com o mesmo problema que eu tive.

    73's de CT1GFQ